Adding a regular appointment
This section describes how to add a regular appointment.
Adding Regular Appointments
Add a regular appointment on the "New appointment" screen.
-
Click the app icon
 in the header.
 -
Click Scheduler.
-
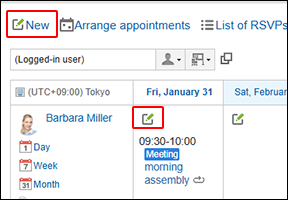
On the "Scheduler" screen, click the item to add appointments or the
 icon.
icon.
-
On the "New appointment" screen, click Regular.
-
In the "Date and Time" field, set the date and time to add an appointment.
Appointments spanning multiple days can be added.
When you click the , a cell to specify the time of the appointment appears. The start and end times can be easily set.
Click the start time cell and the end time cell. You can only select hours. You cannot specify minutes.
The time period to be displayed is set on the "Personal settings" screen. For details, refer to Setting up Appointments Display. If you want to display the date and time of an appointment in a different time zone, click "Other time zones".
 -
In the "Title" field, set the appointment type and the title.
You can select the appointment type from the dropdown list next to the title field.
The displayed menus vary by user.
For details, refer to Setting up Appointment Types.
-
Set the "Attendees" field.
Attendees can be set in one of the following ways.
However, depending on your system administrator settings, you may not be able to select organizations for the attendees.
For details, refer to how to display the appointments of organizations.- Search users by entering keywords in the search box.
- Select organizations or My groups from the dropdown list, and select attendees or organizations in the list.
- Click the icon
 for all the organizations, select users or organizations.
You cannot select a role as an attendee.
When you select a user and click "User details", the screen for user details list is displayed and you can check the details of the user information.
-
Configure the "Shared with" users as necessary.
You can share your appointment information with non-attendee users.
For details on how to configure the "Shared with" users, refer to Sharing Appointments with Non-Attendee Users. -
Select the "Facilities" field.
Facilities can be set in one of the following ways.
- Search facilities by entering keywords.
- Select a facility group or My group from the dropdown list, and select facilities in the list.
For a facility that has already been booked on the date and time you specified, a warning icon
 indicating a double-booking is displayed at the beginning of the facility name.
When you select a facility and click the item for facility information details, the screen for facility details list is displayed and you can check the details of the facility information.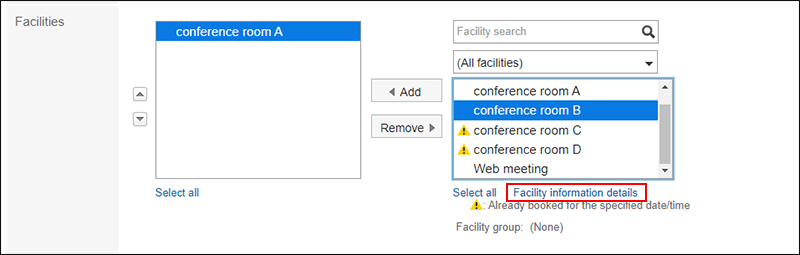
If you select a facility that requires a usage request, the item to enter the purpose of facility is displayed. Be sure to enter the purpose of usage. For details, refer to Facility usage request.
-
To check the availability of attendees and facilities, click Select facility and date/time from available time slots in the "Availability" section.
The "Check available times" screen opens and shows the available time slots of attendees and facilities.
You can select the facility to use or change the appointment time based on their available time slots.
For details, refer to Checking Availability When Adding Appointments.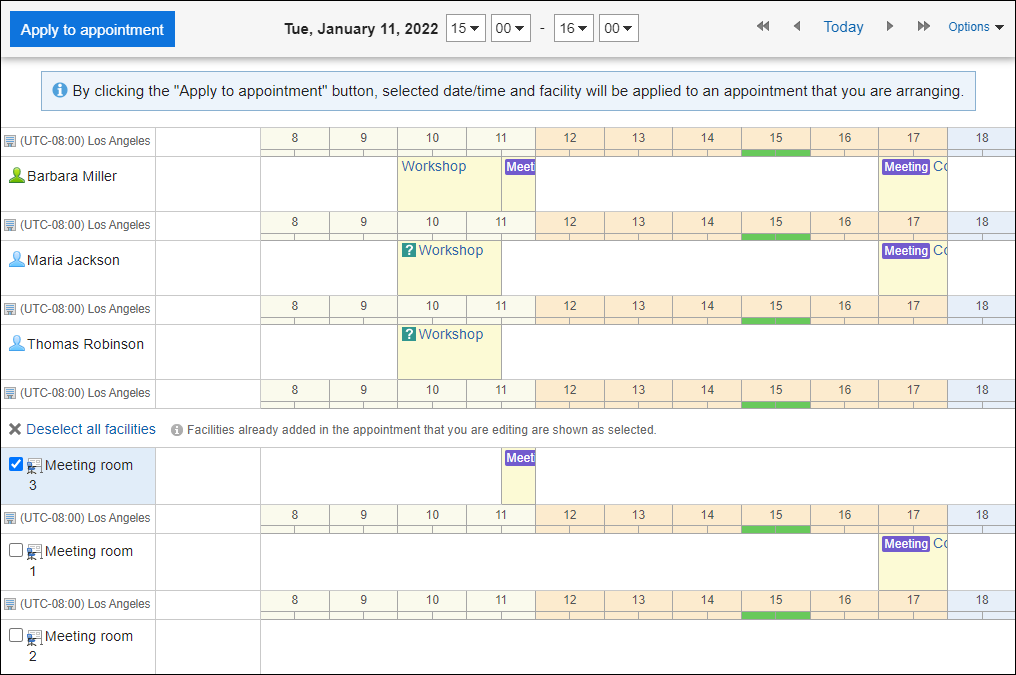
-
If you want to set up company information, click the item to add the information of the other parties in the "Company Information" field and enter the required information.
When you click Route search, you can search the route information for enpanese public transportation and find the information. The Route search field may not be displayed, depending on the setting configured by your system administrator.
-
Set the Memo field as necessary.
-
If necessary, attach files to the "File" field.
You can also attach files by drag and drop.
For details, refer to Using Drag and drop feature.
-
Set the "Visibility" field.
The following items can be set.
- Public:
Make the appointment visible to all users. - Private:
Only the attendees and "Shared with" users can view the appointment.
- Public:
-
Set the "RSVP" field.
Depending on your system administrator settings, the "RSVP" field may not be displayed.
When you select the checkbox for the attendance when you add an appointment, you can ask the attendees to response for the appointment whether to accept it or not.
For details, refer to Responding to attendance request.
-
Confirm your settings and click Add.
If the specified date/time overlaps with an existing appointment of an attendee, is displayed at the end of the attendee's user name on the "Appointment Details" screen.
| Items | Description |
|---|---|
| On | Set the date and time of the appointment. |
| Subject | Set the appointment type and the title of the appointment. For details on the appointment type, refer to Setting up Appointment Types. |
| Attendees | Select attendees. However, depending on your system administrator settings, you may not be able to add organizations for the attendees. For details, refer to how to display the appointments of organizations. |
| Shared with | Select "Shared with" users of an appointment. "Shared with" users cannot be set in all day appointments. Depending on your system administrator settings, you may not be able to add organizations or roles as "Shared with". For details, refer to Allowing Users to Specify Organizations/Roles for "Shared with" Users. |
| Facilities | Select facilities. The facility cannot be set for All day appointments. For a facility that has already been booked on the date and time you specified, a warning icon 
|
| Purpose | This field is displayed when you have selected any facilities requiring usage requests. Facilities with the usage requests are available only for regular appointments. Be sure to enter the purpose of usage. |
| Availability | Select the facility to use or change the appointment time based on their available time slots. For details, refer to Checking Availability When Adding Appointments. Clicking Arrange Appointments enables you to add multiple appointments while checking the availability of other users and facilities. You can also add tentative appointments by selecting multiple suggested time slots. |
| Company information | Enter company details such as company name and address. |
| Memo | Enter notes for the appointment. |
| Attachments | Attach a file to an appointment. For details, refer to Attaching Files. Depending on your system administrator settings, you may not be able to attach files. You cannot attach files to repeating appointments. |
| Visibility | Select whether to make the appointment public. It may not be displayed depending on the system administrator settings. Only creators, attendees, and "Shared with" users can view, edit, or delete private appointments. All day appointments cannot be set to private. |
| RSVP | You can select whether to request responses for attendance to attendees of an appointment. For details, refer to Responding to attendance request. The attendance can only be used for regular appointments. |
Checking Availability When Adding Appointments
This section describes how to check availability of attendees and facilities when adding appointments.
-
Go to the "New appointment" screen.
For details, refer to Step 1 to Step 3 in Adding Regular Appointments. -
Select attendees and facilities.
-
Click Select facility and date/time from available time slots.
The "Check available times" screen is displayed in a new window.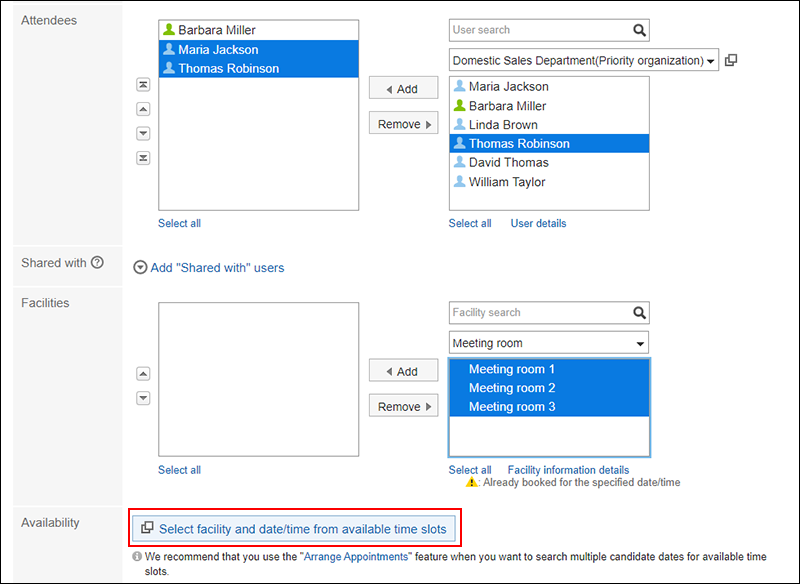
-
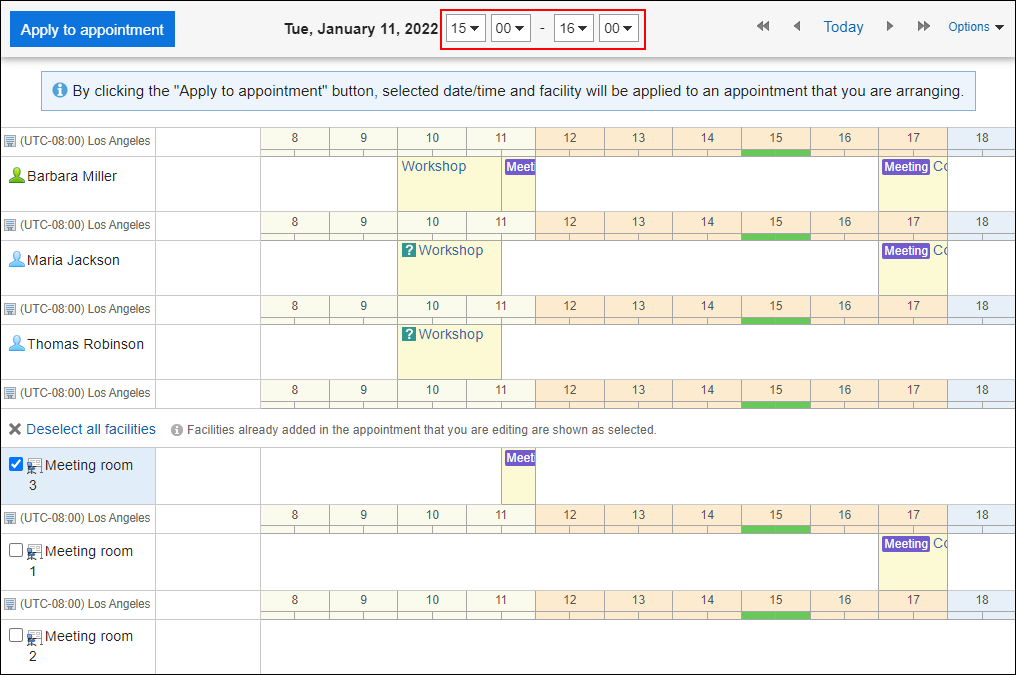
On the "Check available times" screen, check the availability of the attendees and facilities of the appointment.
The non-working hours of users are grayed out.
The background color for holidays is red. -
Select a checkbox for the facility you want to use.

-
Select the time to add for an appointment from the dropdown list, as necessary.
-
Click Apply to appointment.
The "Check available times" screen is closed and the selected date/time and facility are applied to the "New appointment" screen.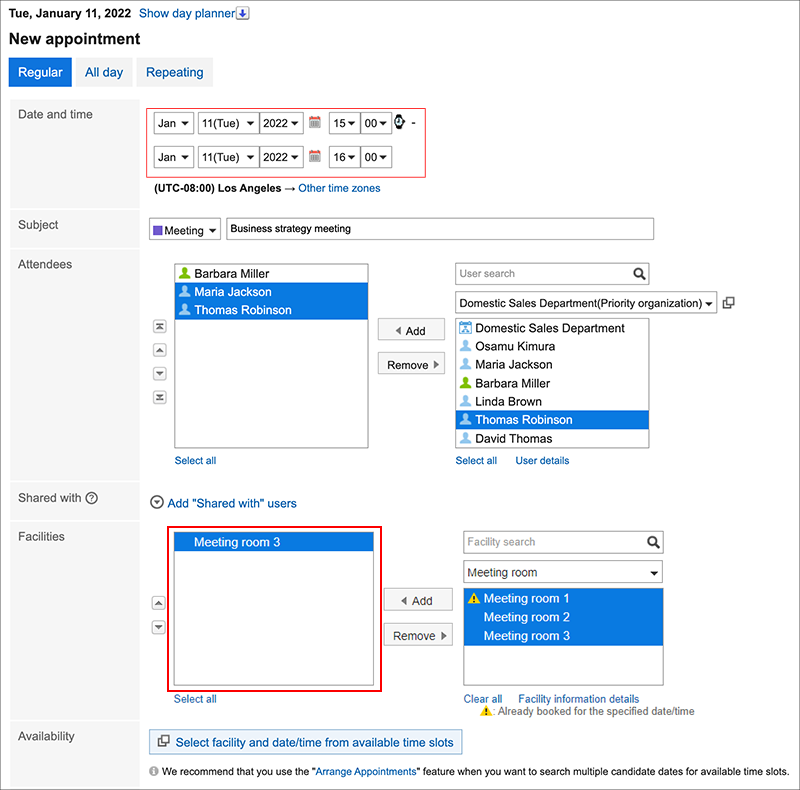
Sharing Appointments with Non-Attendee Users
This section describes how to configure non-attendee users as "Shared with" users when adding appointments.
-
Go to the "New appointment" screen.
For details on how to display them, refer to Step 1 to Step 3 in Adding Regular Appointments. -
Click Add "Shared with" users in the "Shared with" field.
-
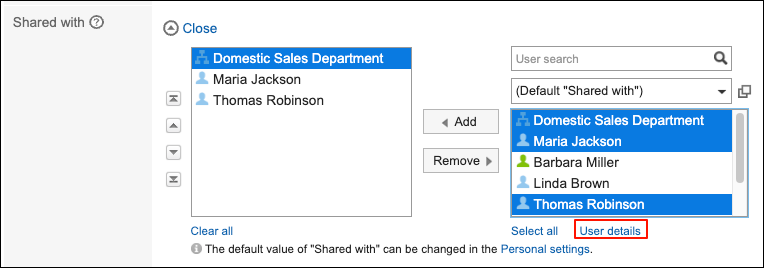
Select users to add as the "Shared with" users.
"Shared with" users can be set in either of the following ways:
- Search users by entering keywords in the search box.

- Select a default "Shared with" value, an organization, or a My group from the dropdown list, and select users or organizations in the list for "Shared with".

- Click the icon of all the organizations, and select users, organizations, or roles.
When you select a user and click "User details", the screen for user details list is displayed and you can check the details of the user information.
- Search users by entering keywords in the search box.
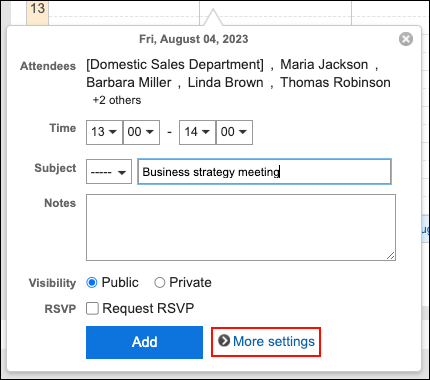
Adding Regular Appointments Quickly
On the "Scheduler" screen, you can display a pop-up window and quickly add regular appointments.
-
Click the app icon
in the header. -
Click Scheduler.
-
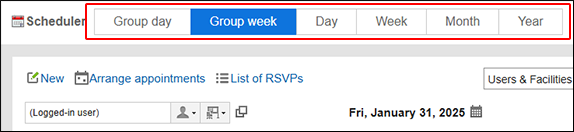
On the "Scheduler" screen, select one of the following screens.
- Group Day View Screen
- Group Week View screen
- Day View Screen
- Week View Screen
- Month View Screen
-
To display the pop-up window, perform the following actions, depending on the screen that you have selected in step 3.
- When the Group Day view screen is selected:
Double-click the free time slot or the time period without any appointments.
- When the Group Week view and Month view screens are selected:
Double-click the empty area of the appointment field.
- When the Day view and Week view screens are selected:
Drag or double-click the empty area of the appointment field.
The start and end times of an appointment can be specified in 30-minutes by dragging them.
Selected users, organizations, and facilities are prefilled in the "Attendees" and the "Facilities" fields.
- When the Group Day view screen is selected:
-
Set the required items.
You can set the following items on the popup window:
- Start and end times of the appointment
- Appointment type and Appointment title
- Memo
- Visibility
- RSVP
If you are the only attendee for the appointment, the "RSVP" field will not be displayed.
To set other items such as attendees and facilities or to check availability of attendees and facilities, click "More settings" on the popup window.
-
Confirm your settings and click Add.