Creating additional portals
You can create portals in addition to the preset one and configure their content and layout using components called widgets.
You might want to create separate portals for different departments or purposes, showing only the information they need.
Examples of additional portals
Portal for company-wide announcements
You can create a portal that provides access to company-wide announcements, procedures, FAQs, and application forms to ensure clear communication across your organization.
It can be used to share information company-wide and handle internal inquiries in one place.
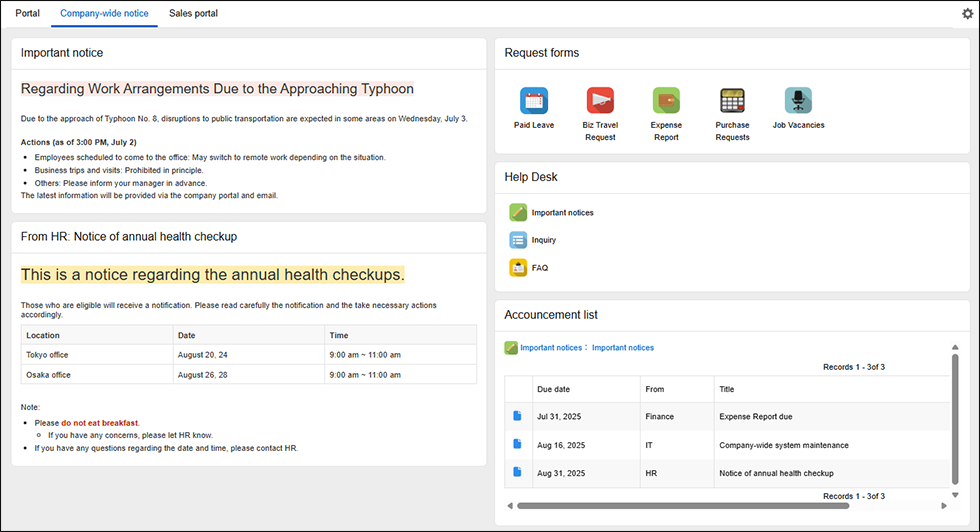
Examples of widgets to use:
- Important announcements (Rich text widget)
- Announcements from General Affairs (Rich text widget)
- Application forms (Selected apps widget)
- Help desk (Selected apps widget)
- List of announcements (View widget)
Department portal
You can create a separate portal dedicated to a specific department, making it easier for members of the department to do their work.
For example, a portal for the Sales Department can be used to display frequently checked information—such as the department's goals and sales figures—along with sales-related proposals and progress tracking, all in one place.
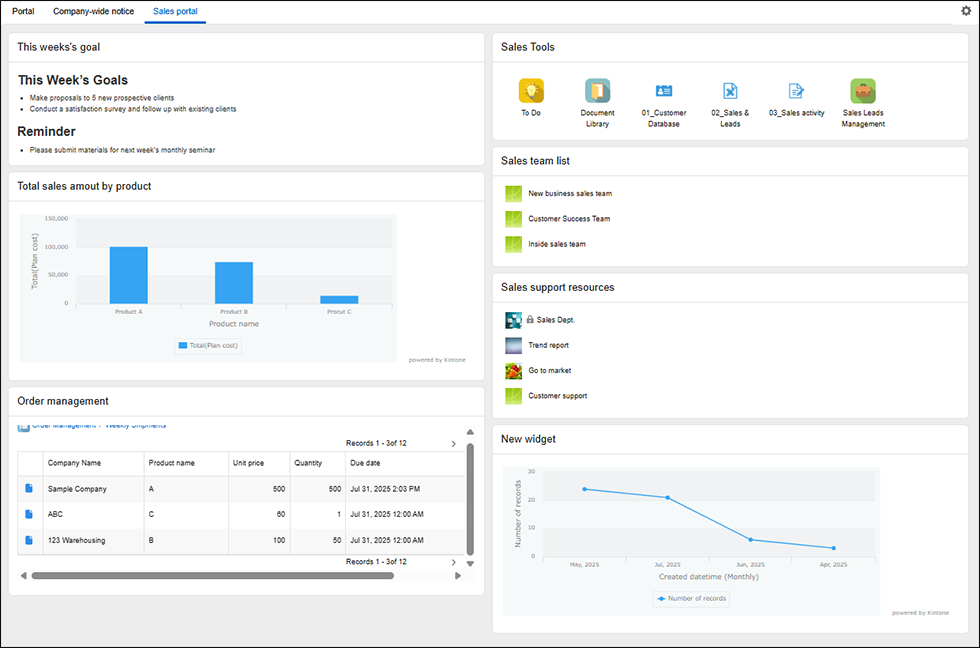
Examples of widgets to use:
- This week's sales goals (Rich text widget)
- Sales by product (Graph widget)
- Order and shipping information (View widget)
- Sales-related apps (Selected apps widget)
- List of sales teams (Selected spaces widget)
- Sales support resources (Selected spaces widget)
- Inquiry count (Graph widget)
Steps
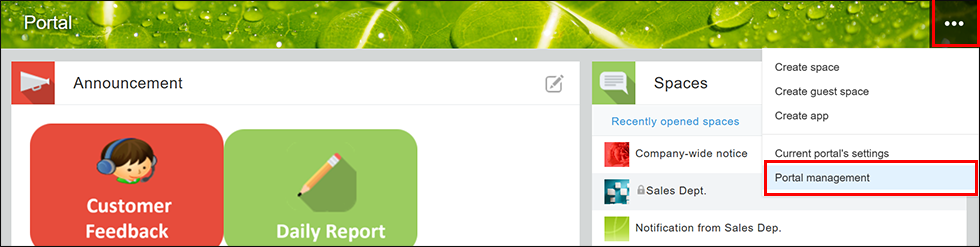
Open the "Portal settings" screen
-
Click the Options icon (the three dots) at the upper right of your current portal, then click Portal management.
-
On the Portal management screen, click the Portals tab.
-
Under Portals created by administrators, click Create portal.
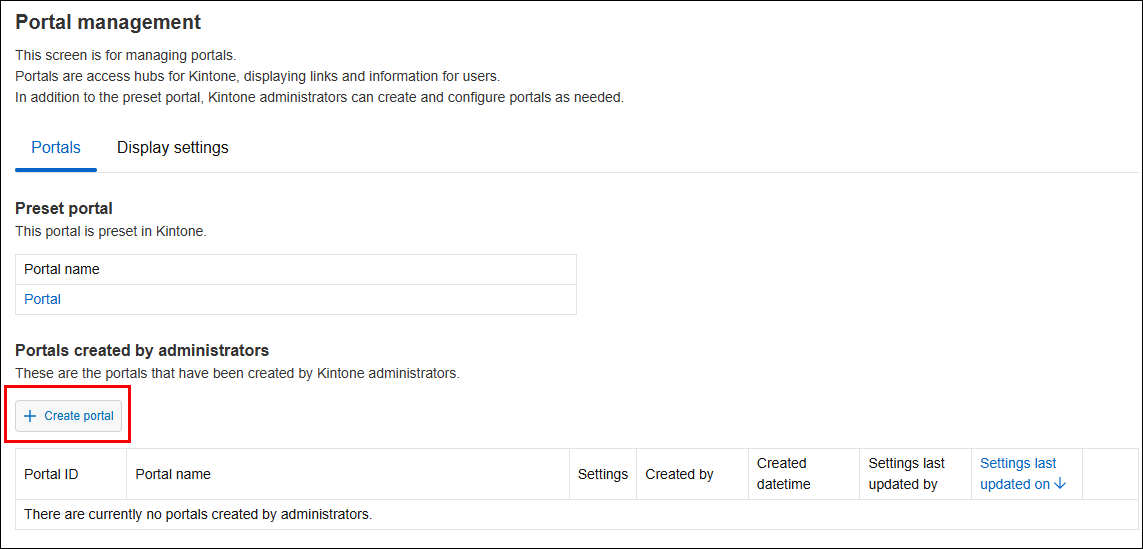 The Portal settings screen will be displayed.
Set the portal name
- On the Portal settings screen, enter a name in the Portal name field.
The Portal name field must be filled in. You can enter up to 128 characters.
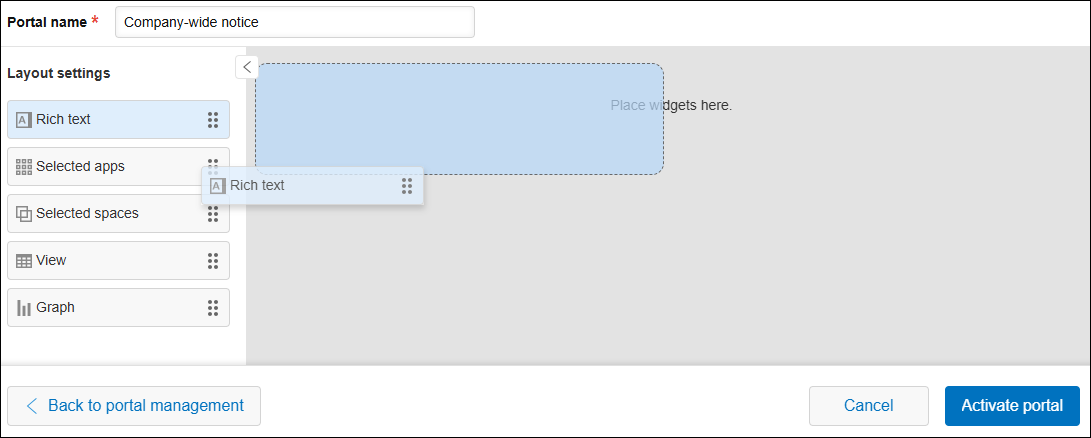
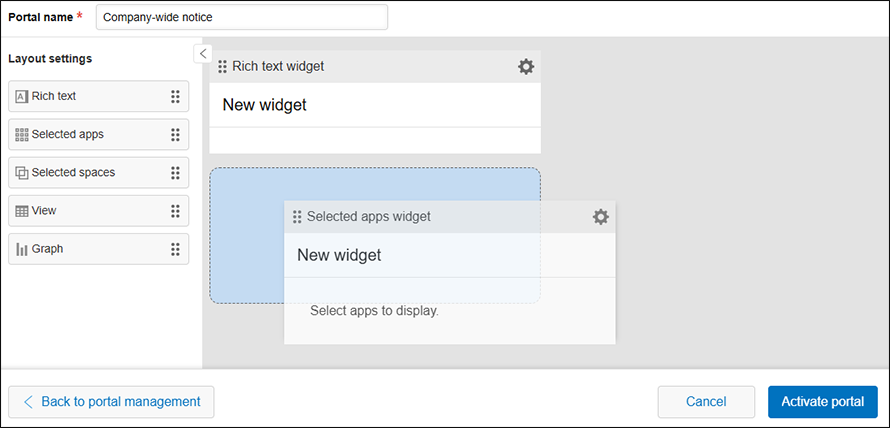
Place widgets on the portal
-
Drag widgets from the list and drop them where you want them to be displayed.
-
If necessary, adjust the positions of the placed widgets by dragging them to the right locations.
-
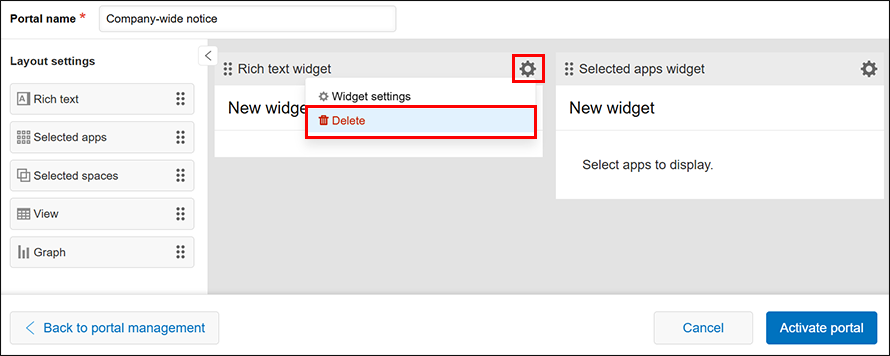
If necessary, remove any unnecessary widgets by clicking the Settings icon (the gear-shaped icon) on them and selecting Delete.
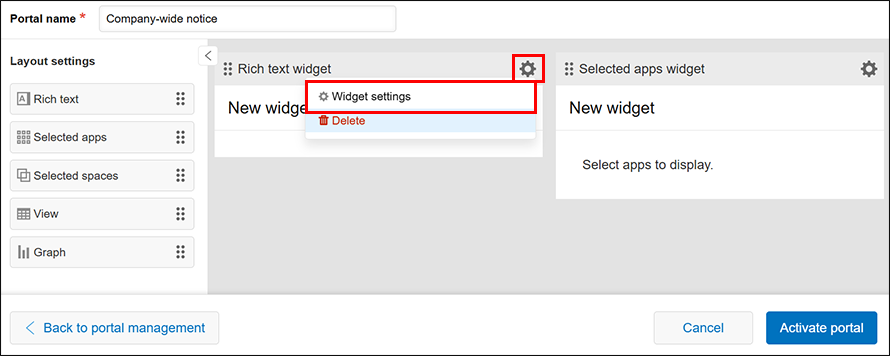
Edit the widgets' settings
-
For each widget, click the Settings icon (the gear-shaped icon) and select Widget settings.
-
On the settings screen of each widget, edit the settings as necessary and click Save.
For details on the settings for each widget, refer to the following pages.
Activate the portal
-
After making sure that your portal is as you want it, click Activate portal.
-
On the dialog that asks if you're sure you want to save the portal's settings and make it available to use, click OK.