Setting up Garoon Scheduler Connector
Garoon Scheduler Connector is a plug-in that links kintone and Garoon Cloud. This plug-in is provided for free.
With this plug-in, you can associate customer information and other data in kintone with appointments that are managed with Garoon's Scheduler feature.
Garoon product website
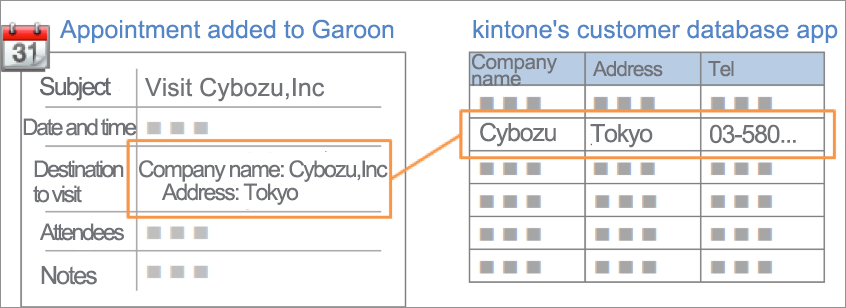
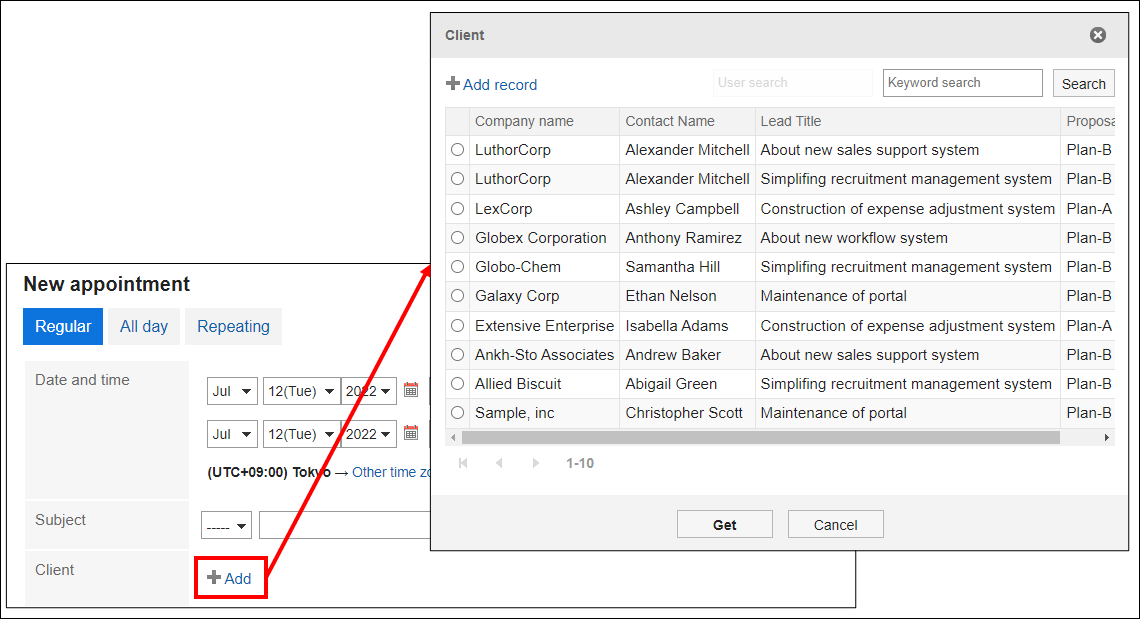
When this plug-in is applied, an additional item, which enables users to retrieve data from a linked kintone app, is added to the [New appointment] screen of Garoon.
By selecting an app record whose data you want to retrieve and then adding the appointment to Garoon, you can associate the record with the appointment.
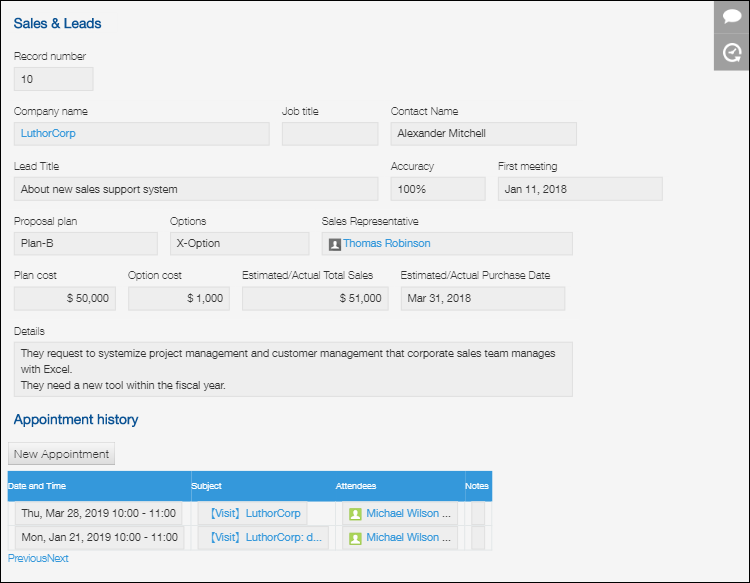
Garoon appointments that are associated with an app record are displayed in a list on the record.
This is beneficial, for instance, when you want to track visits to customers.
Setting up the connector
Configure the settings required for creating a linkage between kintone and Garoon's Scheduler feature. The following are the steps.
Step 1: Install the Garoon Scheduler Connector plug-in on your kintone.
Step 2: Set up the app form.
Step 3: Add the plug-in to the app and configure its settings
Step 4: Check the app ID.
Step 5: Configure the linkage with kintone on Garoon Cloud.
Step 1: Install the Garoon Scheduler Connector plug-in on your kintone
A kintone administrator needs to install the Garoon Scheduler Connector plug-in on the Plug-ins screen in kintone administration.
For details, refer to the following page.
Adding plug-ins from the Plug-in marketplace
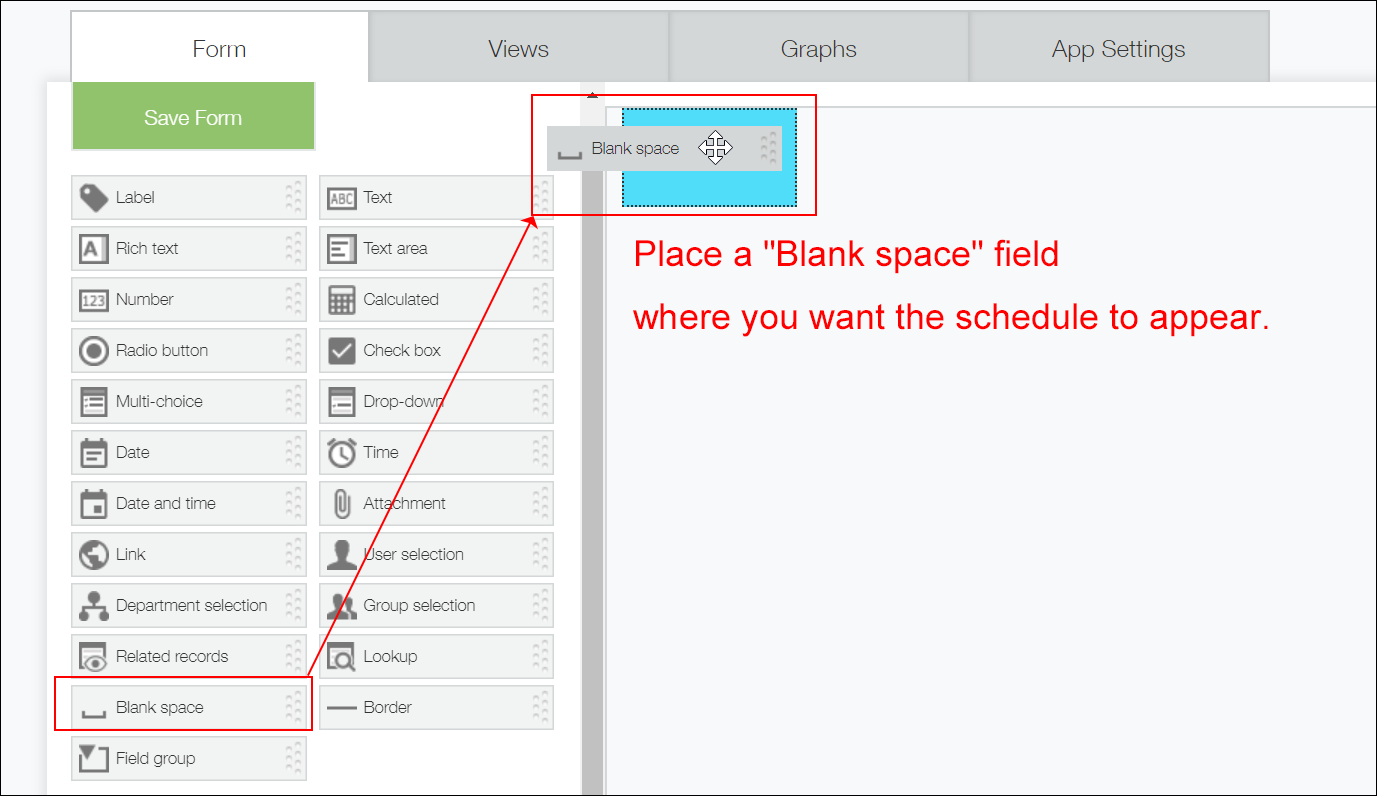
Step 2: Set up the app form
In the app's [Form] tab, place a Blank space field at the location where you want to display Garoon appointments.
After you have placed the field, specify any value for Element ID on the field's settings screen.
You can optionally place other fields on the app form.
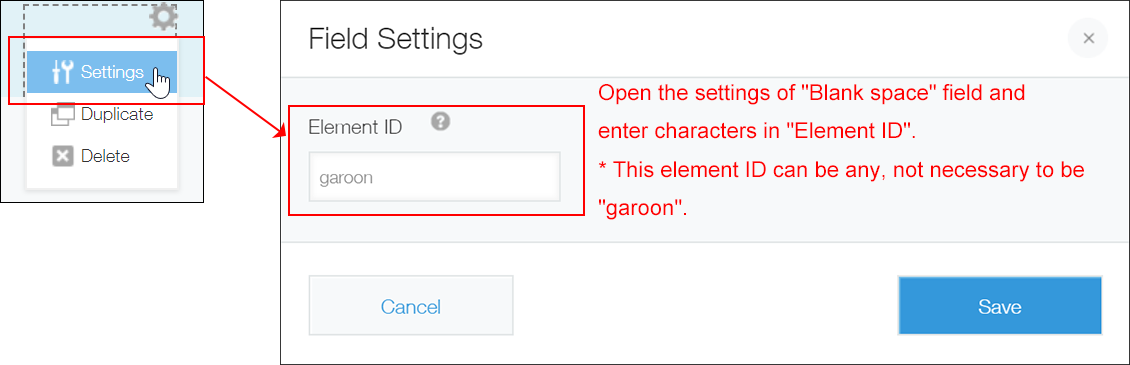
After specifying an element ID in the Element ID field, click Save.
After that, click Update app, and then click Update app on the confirmation dialog.
Step 3: Add the plug-in to the app and configure its settings
Next, add the Garoon Scheduler Connector plug-in to the app and configure the plug-in's settings.
Add the Garoon Scheduler Connector plug-in
-
Click the App settings icon (the gear-shaped icon) at the upper right of the View screen.

-
Select the App settings tab on the App settings screen, then click Plug-ins under Customization and integration.
-
On the Plug-ins screen, click Add plug-in.
-
On the Add plug-in screen, select the checkbox for the Garoon Scheduler Connector plug-in, then click Add at the bottom right of the screen.
-
Click App settings in the message displayed at the top of the screen, or click Back to app settings at the bottom left of the screen.
Next, configure the Garoon Scheduler Connector plug-in.
Configure the Garoon Scheduler Connector plug-in
-
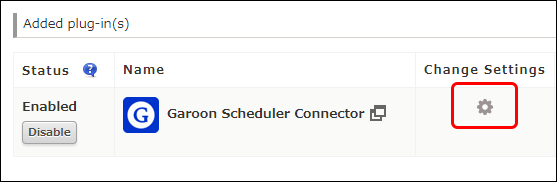
Select the App settings tab on the App settings screen, then click Plug-ins under Customization and integration.
-
Click the Change settings icon to the right of Garoon Scheduler Connector.
-
On the Plug-in settings screen, configure the settings.
- Blank Space Field used for Garoon Scheduler:
Select the element ID that you specified in the Element ID field of the Blank space field (for displaying appointments) that you placed on the app form in Step 2. - Display Order of Appointments:
Select the display order of appointments from the options Ascending and Descending. Appointments are displayed in the specified order based on their start date and time. - Max Number of Appointments to Display at a Time:
Select the maximum number of Garoon appointments to be displayed on the record at a time. - New Appointment Button:
Select whether to display a button for adding an appointment to Garoon.
- Blank Space Field used for Garoon Scheduler:
-
Check the settings and click Save.
-
Go back to the App settings screen and click Update app at the upper right of the screen.
-
On the confirmation dialog, click Update app.
The settings of the plug-in will be applied to the app.
Step 4: Check the app ID
Navigate to the View screen of the app and check its ID from the URL displayed. You will use this ID to configure Garoon settings.
https://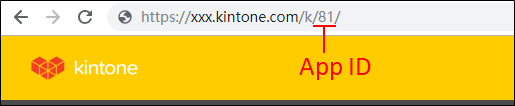
Step 5: Configure the linkage with kintone on Garoon Cloud
Next, configure the settings on Garoon.
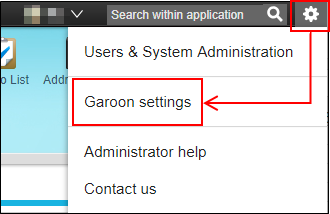
-
Access Garoon, click the Administration menu icon (the gear-shaped icon) at the upper right corner of the screen, and then select Garoon System Administration.
-
Click the Application settings tab, and then select Scheduler > kintone connector.

-
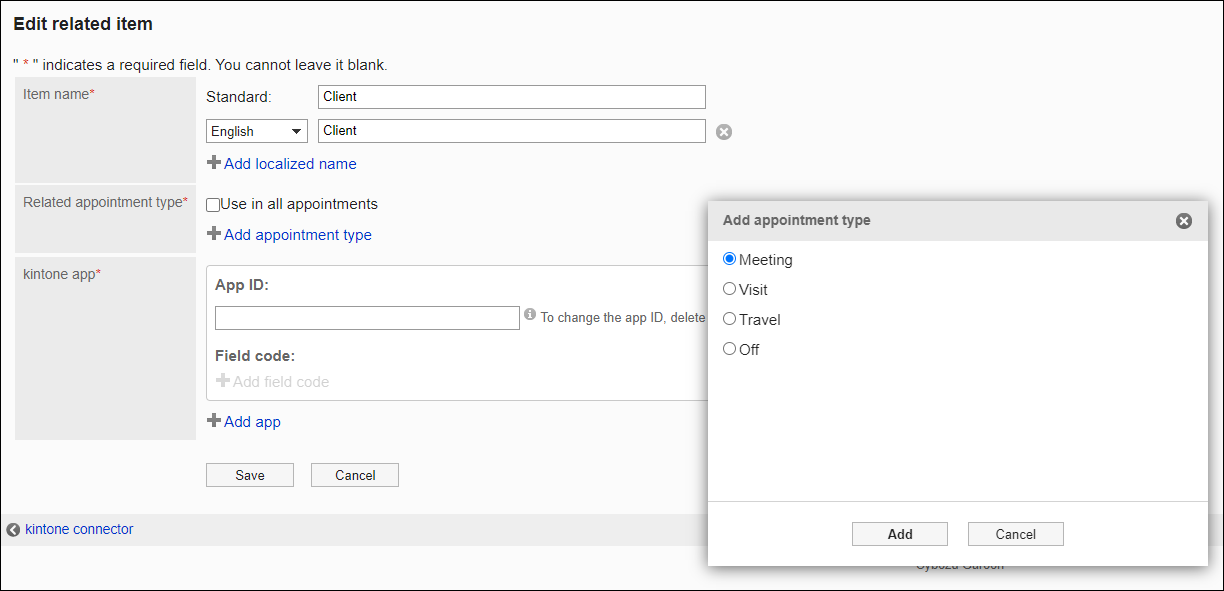
On the kintone connector screen, click Add related item.

-
On the Add related item screen, enter a value in the Standard field in the Item name section.
 The name you specify here will be displayed as the item name on the appointment screens.
 -
Configure the setting in the Related appointment type section.
- If you select the Use in all appointments checkbox, the item will always appear on Garoon appointment screens, such as the Appointment details and the Edit appointment screens.

- You can also display the item on Garoon appointment screens (e.g., the Appointment details and Edit appointment screens) only when a specific appointment type is selected. When you uncheck the Use in all appointments checkbox and click Add appointment type, you can select the appointment type for which the item will be used. Note that it is also possible to add multiple appointment types.
- If you select the Use in all appointments checkbox, the item will always appear on Garoon appointment screens, such as the Appointment details and the Edit appointment screens.
-
In the kintone app section, enter the app ID that you checked in Step 4: Check the app ID.
-
Click Add field code displayed below Field code, select an app field you want to display on Garoon appointment screens, and click Add.
-
Confirm the settings and click Add.